
Overview of Cloudthrottle Setup
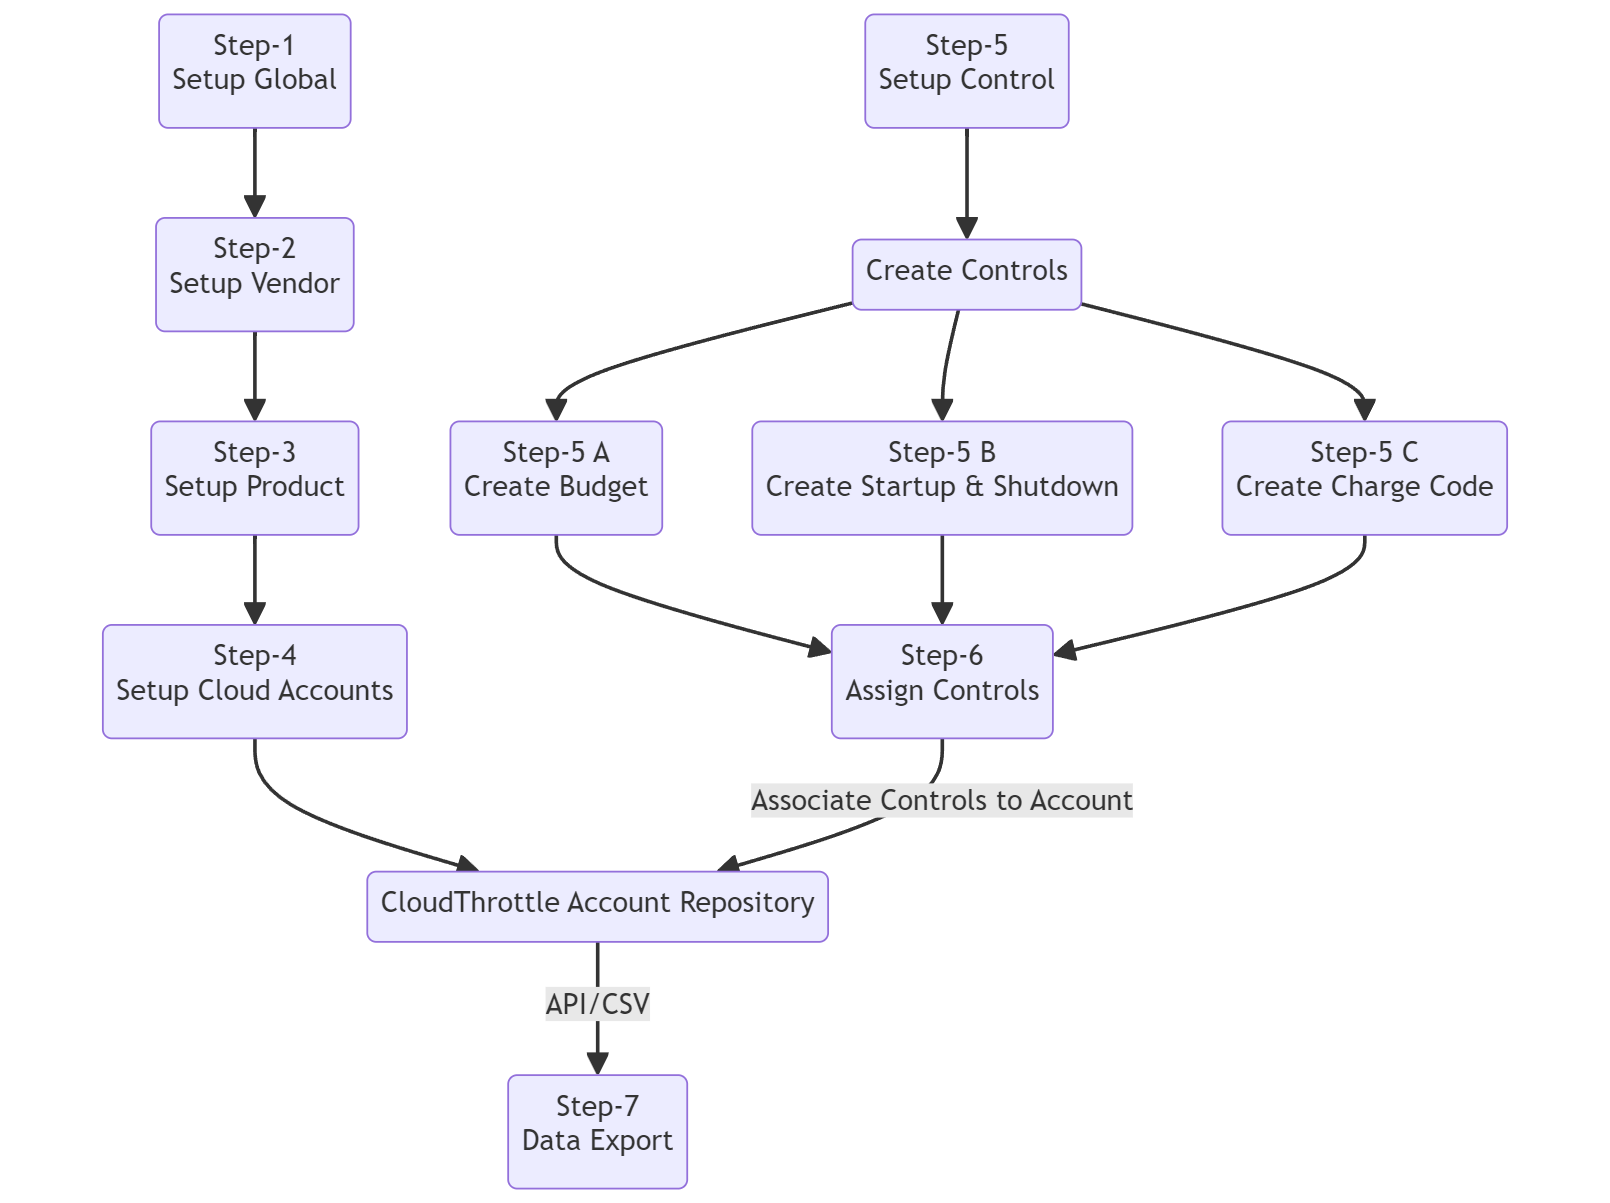
Below diagram illustrates the process of setting up CloudThrottle for your organization.
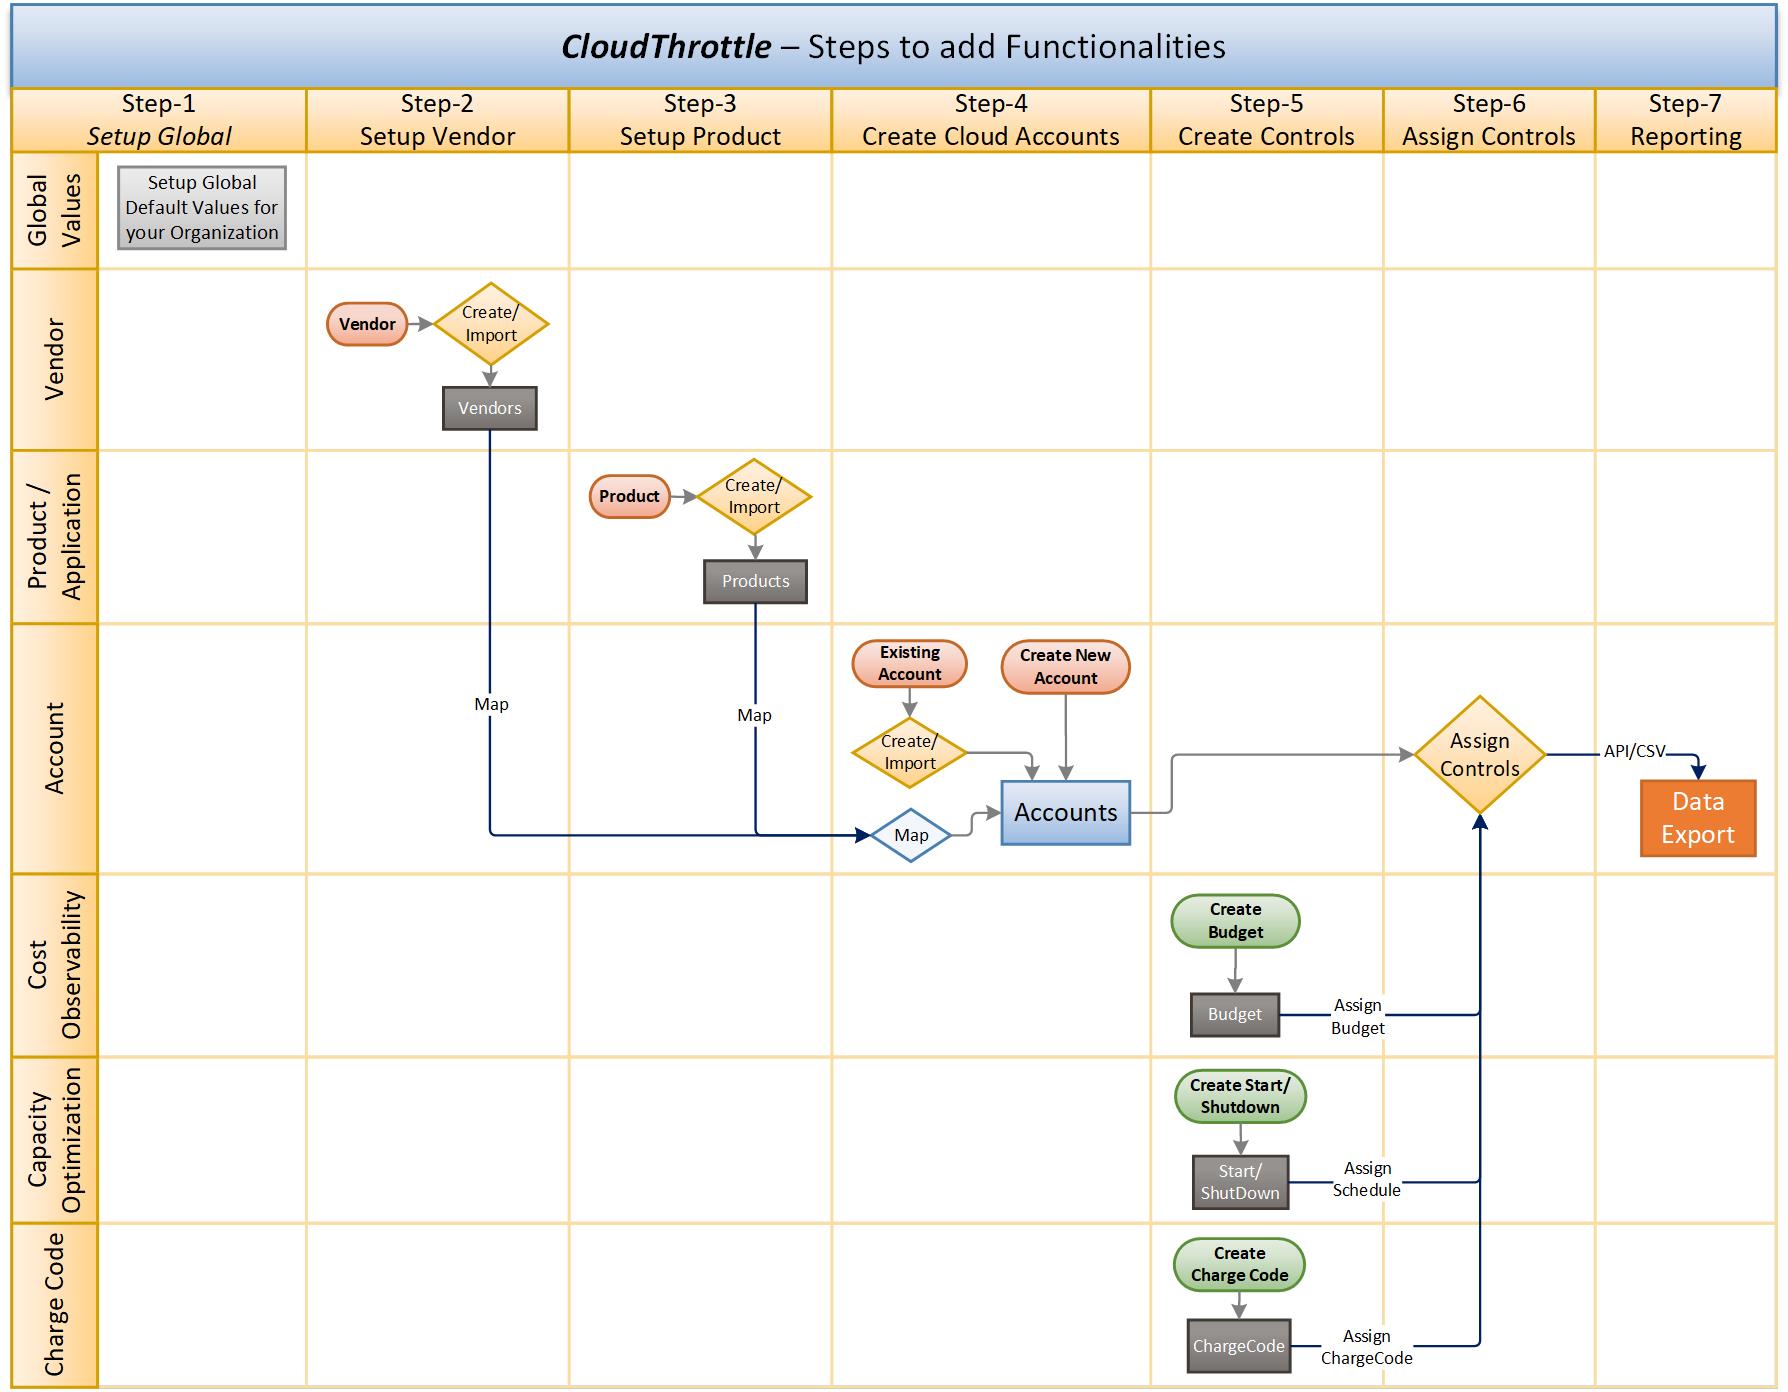
To set up CloudThrottle Cost management platform, follow these step-by-step instructions:
Step 1: Submit CloudThrottle Subscription plan request
- Visit the CloudThrottle website (www.CloudThrottle.com) and select subscription plan.
- Follow the prompts to provide your email address, and agree to the terms of service and submit request
Step 2: Access the CloudThrottle Console
- Once you've signed up subscription plan, you will receive a confirmation email with instructions to access the CloudThrottle Console.
- Click on the provided link or visit the CloudThrottle website and log in using your email address and password.
Step 3: Set up Cloud Credentials
- In the CloudThrottle Console, navigate to the "User Setup" section.
- Follow the instructions to establish the necessary user credentials and permissions for CloudThrottle.
Step 4: Set up Global Defaults for CloudThrottle
- In the CloudThrottle Console, navigate to the "Settings" section.
- Select on the corresponding setup option and enter your Organization default values. Refer Global-Settings instruction
Step 5: Set up your Cloud Service Provider Vendor for your company
- In the CloudThrottle Console, navigate to the "Cloud Account Setup" menu and click on the Vendor to add Cloud Service Provider aka Vendor/Reseller/Channel Partner.
- Follow the instructions to add Vendor information. Refer Vendor-Setup instruction
Step 6: Set up your company's Product / Application List
- In the CloudThrottle Console, navigate to the "Cloud Account Setup" menu and click on the Product to add product list aka Application/Component.
- Follow the instructions to add Product List. Refer Product-Setup instruction
Step 7: Add your company's Cloud Accounts
- In the CloudThrottle Console, navigate to the "Cloud Account Setup" menu and click on the New Account / Existing Account to add your company's cloud accounts.
- Follow the instructions to add Cloud Accounts. Refer Account-Setup instruction
Step 8: Map Product to Cloud Account, where your Application is deployed
- In the CloudThrottle Console, navigate to the "Cloud Account Setup" menu and click on the Existing account.
- Select Account to Map Product
- in the "Action" Column/Field, click three-dots and select Edit Button
- Under "Associate Information" select related Product/Application associated with this account.
- Under "Associate Information", select Infra, Vendor, Environment, etc. related to this Cloud Account.
- Follow the instructions to add Vendor information. Refer Account-Setup instruction
Step 9: Cost management - Setup Budget to Cloud Account
- In the CloudThrottle Console, navigate to the "Cost Management" menu and click on "Budget Setup" to add Budget and its Threshold to your cloud Account
- Follow the instructions to add Budget to your Cloud Account. Refer Budget-Setup instruction
- View your configured Budget information the "Budget Overview" Dash board
- Select appropriate "Account" and Click on it to View and Update Budget details.
Step 10: Cost Optimization - Setup Cloud Account Resources Scheduler to mange Up/Down time of resources.
- Setup Preset Schedule - Refer Preset-Schedule instruction
- ~In the CloudThrottle Console, navigate to the "Cost Optimization" menu and click on "Preset Schedules" to create your company's default Operational hours.
- ~Follow the instructions to add Preset Schedule.
- Setup Cloud Resource Schedule - Refer Resource-Scheduler instruction
- ~In the CloudThrottle Console, navigate to the "Cost Optimization" menu and click on "Resource Scheduler"
- ~Account-Level: Select Account-Number in which you need to apply Up & Down Preset-schedule on the account level to apply Preset-Schedule to all the resources associated with that account
- ~Resources-Level: Click on Account-Number in which you need to setup individually Up & Down schedule to the resource.
Step 11: Financial Management - Setup Charge-Code and Export Master Mapping Data
- Charge Code - In the CloudThrottle Console, navigate to the "Financial Management" menu and click on the "Charge Code" to add Charge-Back or Show-Back Information to the cloud accounts.
- Follow the instructions to add Charge Code to the account. Refer Charge Code Setup instruction
- Master Mapping - In the CloudThrottle Console, navigate to the "Financial Management" menu and click on the "Master Mapping" to export Summary of Account mapped information/Data for Cloud Data Modelling
- Follow the instructions to export Master Mapping Data. Refer Master Mapping instruction to export the data for further Cloud Billing Data Modelling
Step 12: Dash Board - Provides pre-defined Summary of the CloudThrottle System Information (Upcoming)
- Refer Dashboard for the details